

• Skip to main content
  • Skip to header right navigation
  • Skip to after header navigation
  • Skip to site footer
Kate Hadfield Designs

Kate Hadfield Designs

Hand-drawn Digital Scrapbooking kits and Clip Art for teachers, scrapbookers and crafters!

  • Shop
  • Blog
  • Gallery
  • VIP Doodle Den
  • Freebies
  • About
  • Shop
  • Blog
  • Gallery
  • Doodle Den
  • Free Goodies
  • Colouring Pages
  • Digital Scrapbooking Templates
  • DIY & Craft Projects
  • Cardmaking Tutorials
  • About
  • Colouring Pages
  • Free Templates
  • Free Printables
  • DIY & Crafts
  • Bullet Journal
  • Tutorials
    • What is Digital Scrapbooking?
    • Digiscrap tutorials
    • Craft Tutorials
    • Cardmaking Tutorials

Joy To The World handmade Christmas card tutorial

by Dani B

Hello everyone! How are we all? I’m back with another Christmas card tutorial for you. This has a cosy feel and great if you love creating an inky background.

handmade Christmas fireplace greetings card

So here goes….

I started by printing the cute fireplace to fit a UK A6 card, from the Home for the Holidays Digi stamp set and then I coloured it using my Copic markers in the following colours:

  • Light Brown: E31, E35, E55
  • Dark Brown: E25, E23, E59, E79
  • Fireplace stones: E15, E47
  • Fire: Y00, Y02, Y13, Y35, YR15, YR04, YR16, YR09
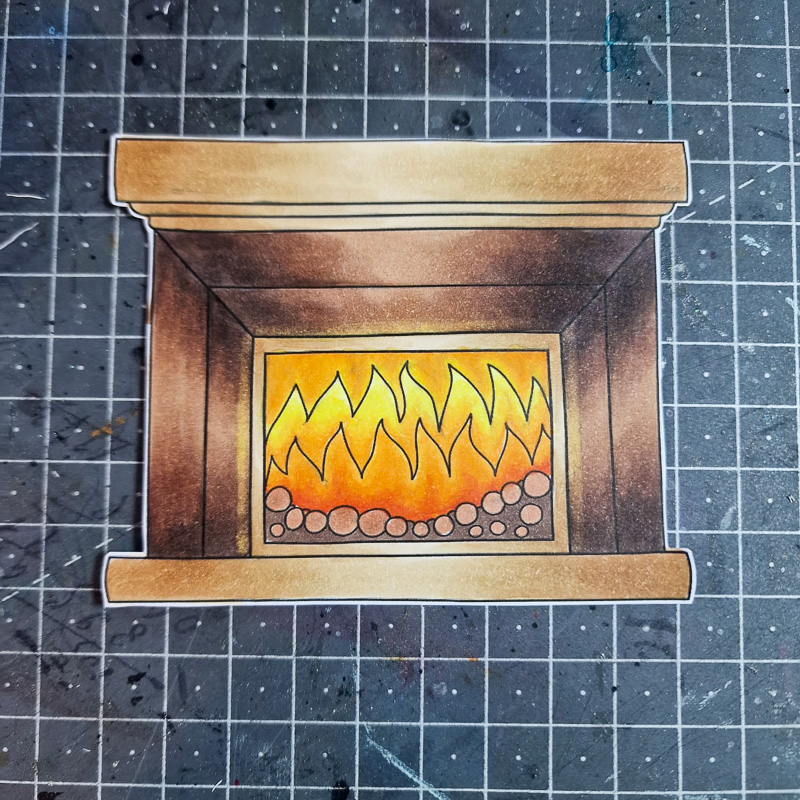
I fussy cut my Fireplace out and added some White highlight detail using my white gel pen. I popped this aside whilst I created my background.

I made a card blank into a top fold UK A6 by cutting a piece of white card in half down the length. I then cut a piece of white, super smooth 300gsm card down to approx 3mm smaller around each edge than the card front.

Onto this, I blended my Distress Oxides. I covered the entirety on the card with Carved Pumpkin. I went in very lightly using Black Soot around every edge. Then, I went in heavier on the very outside edges.

To this, I splatted some watered down blank gesso.
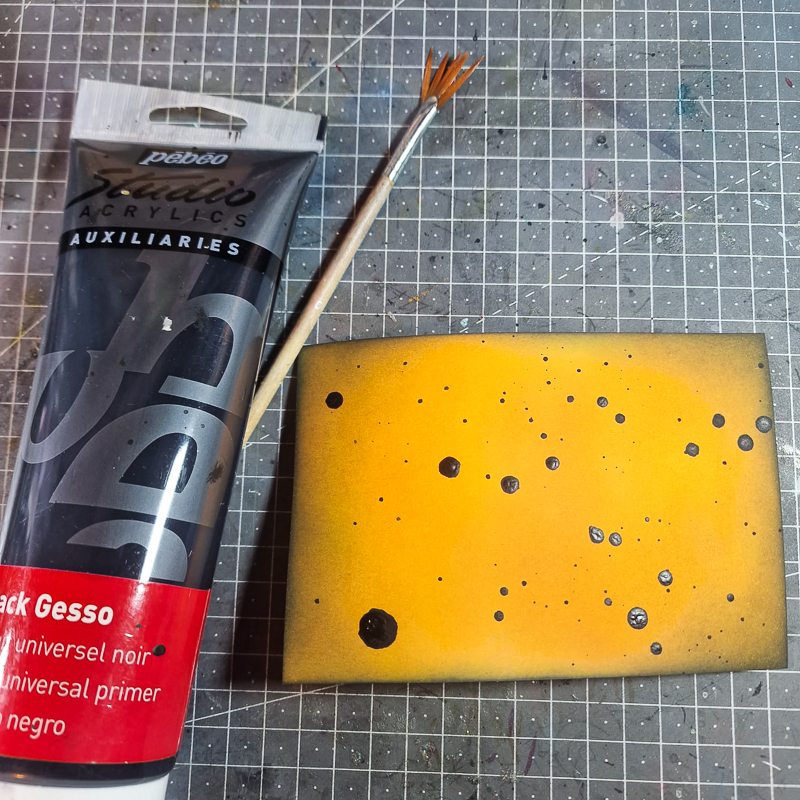
Now I adhered this panel to the front on my card blank using Double sided tape. I sped up the drying process of my splat detail which can warp the card. Double sided tape goes some way to straightening it back out when it’s applied, as opposed to wet adhesive.

Finally, I put my card together. I adhered the fireplace to the card front using foam tape and to finish, I added a pre-made sentiment from my stash to the fire place.

That is it! Here’s the finished card:

handmade Christmas fireplace greetings card

Until next time, take care.

Lots of love, Dani xx

  • Instagram
  • Pinterest
  • YouTube

Materials Used:

  • Home for the Holidays Digi stamp set
  • White card
  • Alcohol markers
  • White Gel pen
  • Wet adhesive
  • Double sided tape
  • Foam tape
  • Distress Oxide inks in Carved Pumpkin and Black Soot
  • A pre-made sentiment
  • Black gesso

You might also like:

SAVE FOR LATER:

  • Facebook
  • X
  • Email

About Dani B

Hello, I’m Dani (short for Danielle). I’m a stay at home mum due to many a health issue and been crafting to cure the boredom for around 15 years. I dare say I have a crafting style as my style is forever evolving but I LOVE clean and simple and struggle with (although very much admire) mixed media. My favourite technique is probably colouring with my alcohol markers!

Previous Post:Printable Colour In Christmas Cards
Next Post:Colour In Christmas Gift Tags

Reader Interactions

Leave a Reply Cancel reply

Your email address will not be published. Required fields are marked *

ABOUT

High resolution, hand-drawn products for digital scrapbookers, hybrid crafters & teachers. Add a touch of hand-drawn whimsy to your scrapbook pages, craft projects and teaching resources with these fun illustrations!

MY ACCOUNT

My Account
Order History
Wish List
Downloads
Gift Certificates
Newsletter

INFORMATION

Contact
FAQ & Help
Terms of Use
Terms & Conditions
Privacy Policy
Cookie Policy

Copyright © 2026 · Kate Hadfield Designs

Back to top
  • Facebook
  • Instagram
  • Twitter
  • Pinterest
  • Mail