
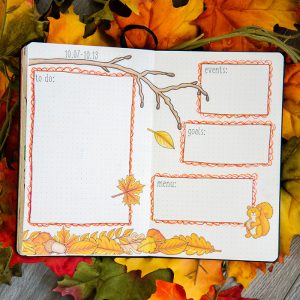


Before I (Stevie!) began my bullet journal, I thought it was something I could never do! I can barely draw stick figures, let alone illustrate a page to be cute. But then I discovered a way I could incorporate Kate’s gorgeous digital images easily. I don’t have to draw, and my calendar, to do list, and weekly menu are all in one place. Also, I feel all artsy and way cooler than I actually am.
Here’s how I use digital scrapbooking supplies to decorate my bullet journal!
Step 1: Choose which graphics you want to use. I love finding the perfect kit for whatever is happening the week I am planning.
Step 2: I like to pull the images up in my editing software and lay them out so I can size them and see how I want my layout to look. THIS STEP IS TOTALLY OPTIONAL! You could just print a selection of images and arrange the printed images in your journal rather than planning the layout.

Step 3: Print your graphics. I use my regular ink jet printer and clear label paper. If you have trouble finding the clear label paper, I always order it from Amazon. (This post is not sponsored. I just really like this product!)

Step 4: Cut out your images. Those of you with a cutting machine can do it that way. I do it the old fashioned way with scissors and patience. It’s more fun if you do it in your vintage, green chair.

You might notice I have extra graphics. That’s because I like to print multiple weeks out at once. That’s totally not necessary unless you’re like me and want to see just how many doodles you can get on one page.

Step 5: Peel the backing of the sticker off, and carefully lay it in place. These stick strong enough you can’t usually move them, so do this part slowly!


Step 6: Once you have a finished page, it’s time to draw in the lines for you calendars or lists. You can make this as fancy or simple as you need (I occasionally stalk Kate’s Instagram for ideas).

Step 7: Fill in all your info and show off how cool you are to you friends!
Here are some other pages from my bullet journal where I’ve used Kate’s doodles to make my own stickers (you can see more in my gallery at The Lilypad!):


I hope this has given you some ideas for using your digi stash in your journal or planner!

 Me, Myself and I
Leave a Reply