• Skip to main content
  • Skip to header right navigation
  • Skip to after header navigation
  • Skip to site footer
Kate Hadfield Designs

Kate Hadfield Designs

Hand-drawn Digital Scrapbooking kits and Clip Art for teachers, scrapbookers and crafters!

  • Shop
  • Blog
  • Gallery
  • VIP Doodle Den
  • Freebies
  • About
  • Shop
  • Blog
  • Gallery
  • Doodle Den
  • Free Goodies
  • Colouring Pages
  • Digital Scrapbooking Templates
  • DIY & Craft Projects
  • Cardmaking Tutorials
  • About
  • Colouring Pages
  • Free Templates
  • Free Printables
  • DIY & Crafts
  • Bullet Journal
  • Tutorials
    • What is Digital Scrapbooking?
    • Digiscrap tutorials
    • Craft Tutorials
    • Cardmaking Tutorials

Birthday Candle card tutorial

by Dani B

Hi crafters. How is everyone?

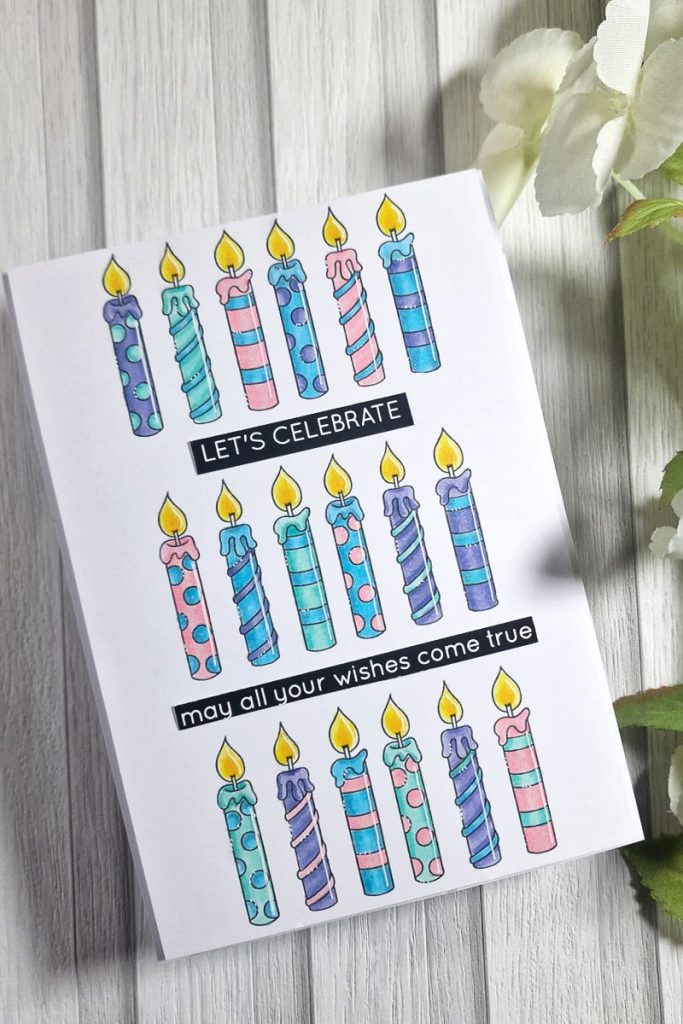
I’m back with another easy peasy card tutorial for you. This time, it’s a birthday card. I don’t actually make many birthday cards so I enjoyed making this one! It’s also a great design for any age and gender. I’ll talk you through what I did…

Handmade birthday card featuring lots of colourful birthday cake candles

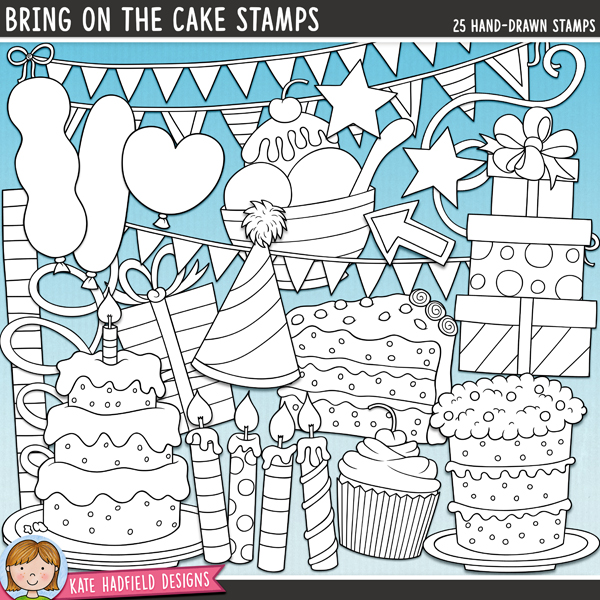
I started by selecting the 3 different candles from the ‘Bring On The Cake‘ stamp set. I inserted them into my word document, then as a group, I copied and pasted over 3 rows. I sized and placed them to ensure they would fit on a UK A6 card blank.

(I started colouring before photographing this step… Oops!)

Then, I went in and started colouring. I try and limit the amount of colours I use in one image as too many can make the finished image look too busy. So, I stuck with 5 colours, 2 shades of each. For larger areas, I’d use a minimum of 3 shades.

I used my Copic markers in Blue B01 and B52, Green BG11 and BG13, Purple BV01 and BV13, Pink RV11 and RV21 and Yellow Y02, Y08 and Y19 (for the flames).
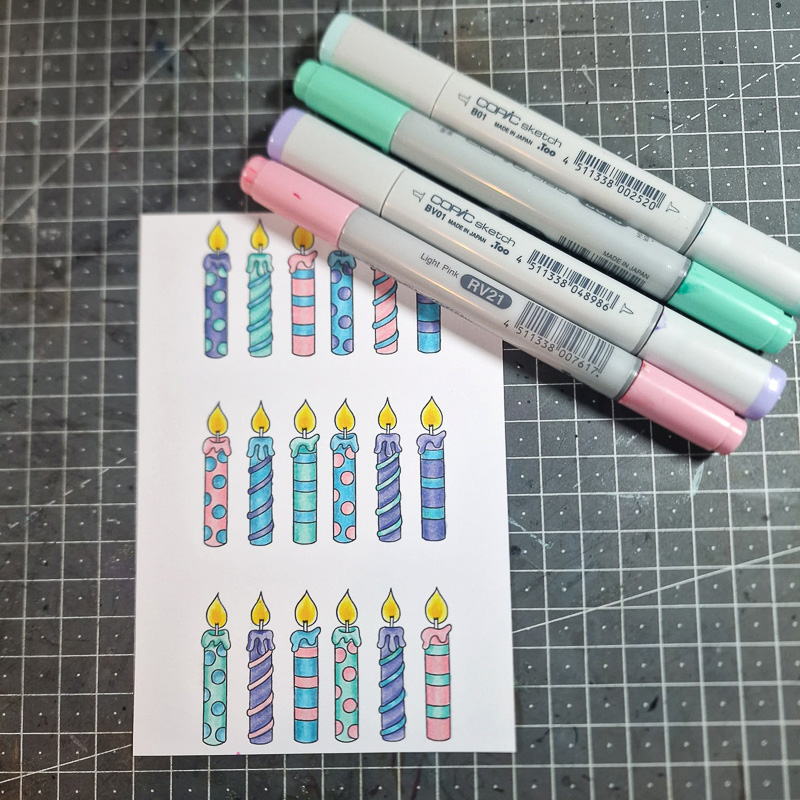
Now I added some white gel highlight quite liberally to each candle.

I wanted the card to have some dimension and typically I would do this by adhering my image to my card using foam tape. However, I printed onto thinner card than I would have liked and as such, foam tape could have lead to tunnels of warping. So, I cut a piece of crafter’s foam to around 1-2mm smaller around each edge than the image and stuck the image to this using wet adhesive.

All that was left was to adhere this to my white top fold card blank using wet adhesive and adding a pre printed sentiment from my stash.

That completes the card!

handmade birthday cake candle card on a white wooden background with whit eflowers

Until next time, take care.

Lots of love, Dani xx

  • Instagram
  • Pinterest
  • YouTube

Materials used:

  • Bring On the Cake stamp set
  • White Super Smooth Card for both the card blank and the image
  • Crafter’s foam
  • Wet adhesive
  • Alcohol Markers – I used Copics but any will suffice
  • White gel pen
  • A sentiment

You might also like:

SAVE FOR LATER:

  • Facebook
  • X
  • Email

About Dani B

Hello, I’m Dani (short for Danielle). I’m a stay at home mum due to many a health issue and been crafting to cure the boredom for around 15 years. I dare say I have a crafting style as my style is forever evolving but I LOVE clean and simple and struggle with (although very much admire) mixed media. My favourite technique is probably colouring with my alcohol markers!

Previous Post:Birthday Bash card tutorial
Next Post:Free Digital Scrapbooking Template: Leaves are Falling 2

Reader Interactions

Leave a Reply Cancel reply

Your email address will not be published. Required fields are marked *

ABOUT

High resolution, hand-drawn products for digital scrapbookers, hybrid crafters & teachers. Add a touch of hand-drawn whimsy to your scrapbook pages, craft projects and teaching resources with these fun illustrations!

MY ACCOUNT

My Account
Order History
Wish List
Downloads
Gift Certificates
Newsletter

INFORMATION

Contact
FAQ & Help
Terms of Use
Terms & Conditions
Privacy Policy
Cookie Policy

Copyright © 2026 ยท Kate Hadfield Designs

Back to top
  • Facebook
  • Instagram
  • Twitter
  • Pinterest
  • Mail