
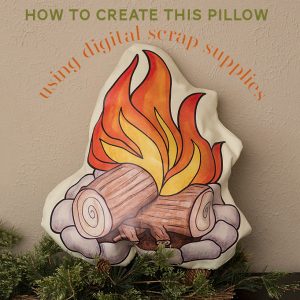

Did you see this pillow and NEED one for your home? Here’s how you can have one, too, and it’s easier than you think!

Pillow #2- The Heat Transfer
Works on: Pillowcases and fabric to sew-your-own pillows
Difficulty: So Easy Your Grandma Can Do It!
Supplies: Pillowcase or Fabric, digital file, heat transfer paper, and an iron.
Step 0 – There is a ridiculously easy way to achieve this, and is the option I took to make my campfire pillow. Save your graphic as a high resolution jpg and send it to your local print shop. They often have higher quality heat transfer material AND an iron press. I chose this method in hopes it would stand up to my crazy child and his crazy messes better, but it is considerably more expensive and not every print shop will offer this.
1. So you aren’t going to the print shop? That’s fine, because this is STILL so easy your grandma could make it! Gather your supplies in one area. Be sure your pillowcase or fabric is washed in warm water before use. Iron very well once dry.
2. Choose your digital file. While you’re browsing through Kate’s shop, you might find too many files and have to make several pillows 🙂 For my print shop camping pillow, I used a graphic from her Summer Camp collection. For the home heat transfer pillow cases I’m making tonight, I used Kate’s Every Day Outlined. This file is perfect for the goal tracking pillowcases I envisioned for my youth group. They’ll even be able to color it with fabric markers. Then each day they will mark off if they are meeting their goal!

3. Upload your file into your editing software. Read the instructions on your heat transfer paper VERY carefully, but most will need you to mirror image your file. Run them through your printer following the exact instructions on your transfer paper. Seriously, follow those instructions like your life depends on it!

4. See these printed beauties? It’s time to get them onto our pillows! Once again, follow all instructions on your heat transfer paper. If you’re getting sick of hearing that, then you realize how essential it is. Heat settings, time, and technique when ironing will all be include where? Yep, on the instructions!!!

5. Once the heat transfer is cool, you can remove the backing paper. And now you are ready to use your pillow (or sew it if you used fabric). We opted to have some coloring fun first!


Here’s final project! A great way to keep track of all those New Year’s goals!


 Scrapbooking Inspiration: Love and Valentines pages
Leave a Reply