


Making a custom background by using blending modes
Hi Everyone! I’m Back!! Today is going to be fun blending and mixing day, to come up with a new background for your layout.
While most times when you buy a designer kit the papers are exactly perfect, however, what about when they aren’t? You may like the texture or design on the paper, however the color or something about it is not matching up to what you are envisioning you want your layout to look like. I am going to help you fix that!
I have been asked to do a quick tutorial on making a custom background from existing papers in a favorite kit. I sometimes do this if I like the paper but need to adjust or alter to fit my needs. I blend a lot of papers together until I get something just right for my layout. There are many different ways to achieve this. You can change Hue/Saturation, you can add a color filled layer over it, you can add a photo to it, you can add styles or patterns, textures, and whatever you like. This is yours, and you are creating.
I am going to use Kate Hadfield Designs “Red- White-n-Blue” background papers.
- Open up a new workspace, and go to File> Open and locate the kit you want to use, and select the papers. Copy and paste it into your layer pallet. The two papers I have opened in my workspace are: Kraft2 (bottom layer) and Card Stock Grey (top layer).

We are now going to use the Blending Modes. What exactly are blending modes? I like to think a blending mode is to Photo Shop/PSE, as a blender is to cooking. [In cooking you may have a recipe, and you would use a blender to add different spices or elements such as milk, eggs, oil, etc. to add your own spin or taste, to what the recipe calls for. By altering or changing the original recipe, you have something that you want to eat, that is specific to your taste buds.] The layer that you apply the blend mode to blends it with the layer directly beneath it.
In your layer pallet under the layers tab, is a drop down box for each Layer.
(Here is the description for blend modes from Adobe , but I will show below a simplified version for quick reference. The page from Adobe, also gives examples of all the blend modes and what they do once applied but you can change the modes by selecting/dialing each one and choosing the mode you like.)

Okay, back to our regularly scheduled tutorial!!
2. We are going to change the blend mode on the Card Stock Grey layer. I am selecting difference as I want a mushroom brown color background that has the Kraft paper texture to it.

3. Choose a photo texture to place on top. I am selecting a painted chip wall , a stock photo from the Morgue File file000650930616. I have placed it in my layer pallet and set the mode to Vivid Light and changed opacity to 26%.

4. Now lets apply an artistic “Underpainting” filter. Filter>Artistic>Underpainting. When the panel comes open, apply the setting in screen print below:

Brush size = 0; Texture Coverage 40, texture Brick, scaling 50, Relief 21 & Light = left
5. If the color is too dark, you can always add a level adjustment layer to make it brighter. See below:

6. Now just merge all and save. Your “new blended BG” paper is finished. You can continue adding more papers, different blend modes etc. but that really is all that is to it. Below is my finished layout after adding text, Kate’s “Fantabulous Fall Doodles” and a photo.

*Supplies: Kate Hadfield Designs: Fantabulous fall– alpha, papers & doodles only; Doodled Borders rounded, Red-White-‘n-Blue papers. Find these and all of Kate’s other adorable doodles to adorn your pages in her store at the Lily Pad. (font is Tangie AJFMadHatter)
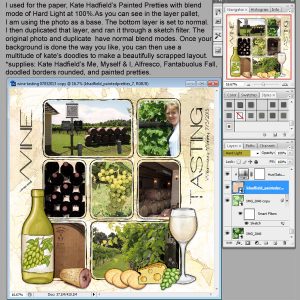
Here is one I did with a grape leaf photo of mine:

*supplies: Kate Hadfield Designs: Me, Myself & I, Alfresco, Fantabuolus Fall, Doodled Borders Rounded, and Painted Pretties can all be found in Kate’s Store at the Lily Pad
In PSE you would do the same thing, although the tools may be in different places.
Just play and experiment with the blend modes and filters, adjust opacity.. just have fun!! I hope you have enjoyed this technique! See you soon for another Photoshop tips & tricks tutorial!


 Free Digital Scrapbooking template: Journal Cards
Leave a Reply